Check In
To check in a document:
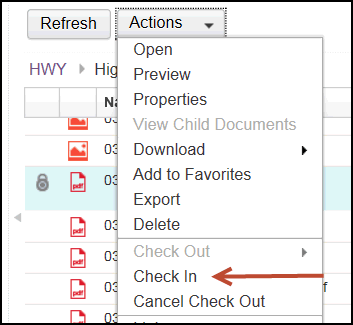
1. Right click the document. A drop-down menu appears.
2. Left click Check In. The Check In view appears showing the original entry template.
3. In the General section, left click the “What do you want to save?” field. A drop-down menu appears.
4. Left click Local document.
5. Left click the Browse button at the end of File name. Your system file list appears.
6. Double left click the file you wish to check in from your system. The file path appears in the File name field.
Note: The Major Version field defaults to Selected when a document is being added. To check in a minor version, uncheck the box.
7. Left click Check In in the lower right-hand corner. The file list shows without the padlock symbol.
See Also